Time & Expenses > Create a time entry
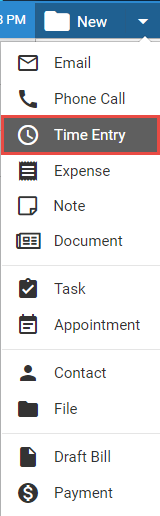
The new time entry opens with as much default information as appropriate which is provided from the selected item.
The new time entry opens with as much default information
as appropriate already provided from the item.

The new time entry appears in the Floating Timer view,
with the timer already running. See Work
with time entries from the Floating Timer view.

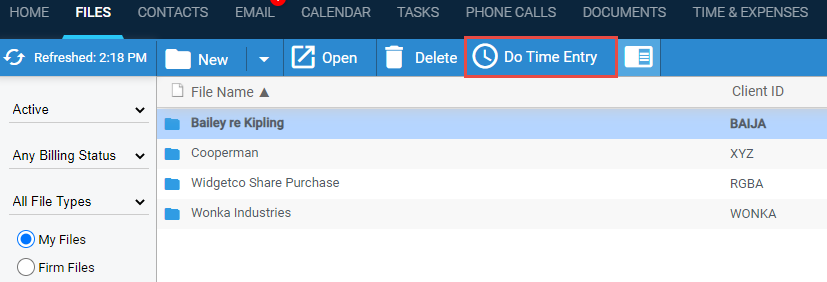
Find your items for which time entries have not yet been
done.The new time entry opens with as much default information as appropriate
already provided from the item. See Add time entries
for items (Time Entry Assistant).

● How many time entries: A file can have as many time entries as you like but, in general, any other kind of item can have only one. Note, however, that if multiple firm members are on an email or appointment, each firm member has a copy of that item and each of those copies can have a time entry.
● If an item already has a time entry: The button instead says View Time Entry.
● Preference: In Options > My Preferences, you can set Amicus to prompt you or automatically create a time entry whenever you mark a task complete, send an email, or save a new phone call.
● File assignment in original item: If the item from which you created the time entry was not already associated with a file, it will be automatically associated with the one you selected for the time entry.
● Code customization: Amicus options let you customize the firm's list of available billing statuses, billing rates, and activity codes. You may do this from Options > Firm Setup or by selecting the "Manage this list" option in the drop-down list in a time entry window.
● Only one time entry timer runs at a time: If the timer is running in a time entry (in an open time entry details window or the floating timer), and you create a new time entry or start the timer in another time entry, the timer will stop running in the previous time entry.
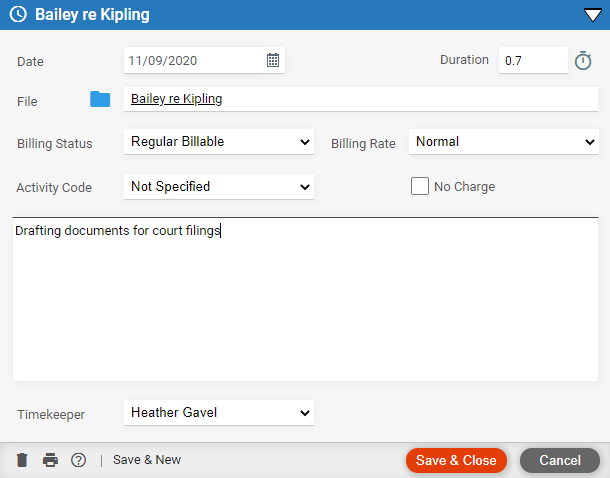
● File: Changing a time entry's file assignment will automatically change its billing status and rate to those specified in the file. Time entries on a file are accessible by all users assigned to that file
● Duration:
In either tenths of an hour or minutes, with a particular minimum, as
set in your Options > My Preferences.
You can click the stopwatch icon to start a timer, and then click the stop
icon to stop it. If the timer is not running, you can edit the duration
directly.
● Billing rate: If set to Flat Rate Activity, you may enter a flat rate amount for the time entry (and the duration will be locked at 1 hour or 60 minutes).
|
Tip: To give a client credit on their account, you can simply enter a time entry with a negative flat rate amount. For example, a client disagrees with the amount you've billed (and they've already paid) for work on a file, and so you now agree to give them $300 credit toward any future charges against that file—enter a time entry with a -300 flat rate amount. |
● No charge: The dollar values of "no charge" time entries are hidden on bills and Time & Expenses views. The values may still be included in selected reports so that you can track profitability. This setting is not available for Flat Rate Activity time entries.
● Task
code: If task codes are enabled for the firm. When you start typing
in a task code, your previously entered values for that field will automatically
appear below in a drop-down list that you may select from.
If the time entry is on a file set for e-billing, a task-based task code
must be selected. Depending on your preference, the name of the selected
task code defaults into the time entry description.
● Activity
code: If activity codes are enabled for the firm. Depending on
your preference, the name of the selected activity code defaults into
the time entry description.
If the time entry is on a file set for e-billing, a task-based activity
code must be selected. Depending on your preference, the name of the selected
activity code defaults into the time entry description.
● Timekeeper:
The default timekeeper is set in your Options > My Preferences. Select
a different timekeeper if you like.
It is the timekeeper's billing rate value that will affect the fee amount
on the bill, and their initials that can be set by the firm to appear
on detailed invoices.

In the details of a time entry for today with the timer
running, click the triangular minimize button.

● The time entry details window closes and only its Floating Timer view is shown, with the timer still running. (If another time entry was previously shown in the Floating Timer, it's automatically saved and closed.) For more information, see Work with time entries from the Floating Timer view.
● View your time entries and expenses list
● Work with time entries from the Floating Timer view
● Add time entries for items (Time Entry Assistant)
● Change multiple time entries (Mass Time Entry Change)How to customize time features
Amicus Cloud (July 2023)
Copyright
