
Contacts > Add a contact
Amicus makes it easy to add contacts.
Did you know? No matter where you do your contact list—on your smartphone or your iPad, in Outlook on your PC, or in Calendar on your Mac—your Amicus Cloud contacts can appear in all of them. Updates made anywhere appear instantly in the others, so your contact list is always current!. To find out more, see How to configure apps and devices to connect with your Amicus account. |
● From the Amicus taskbar in any view, click the down arrow next to New
● Or, from a phone call or email
● Choose whether to share the contact to all firm members
If done from a view of a file, the file is assigned by
default.
● Phone call – A My Preferences > My Contact Settings option determines whether you are prompted to save a new contact, or it's created automatically, whenever you save a new phone call in which the first contact is a typed-in name that isn't in your contact list.
● Outgoing email – A My Preferences > My Contact Settings option determines whether you are prompted to save a new contact, or it's created automatically, whenever you send an email in which the first To contact has a typed-in address that isn't in your contact list.
● Received email – Click the down arrow next to the From email address and, if it's not one in your contact list, a "Create as new contact" option appears. Click that option.
The contact card opens to the Profile pane
.
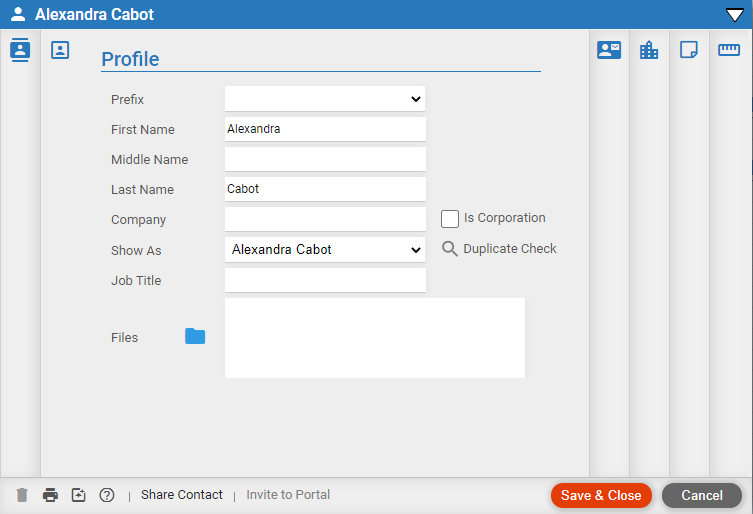
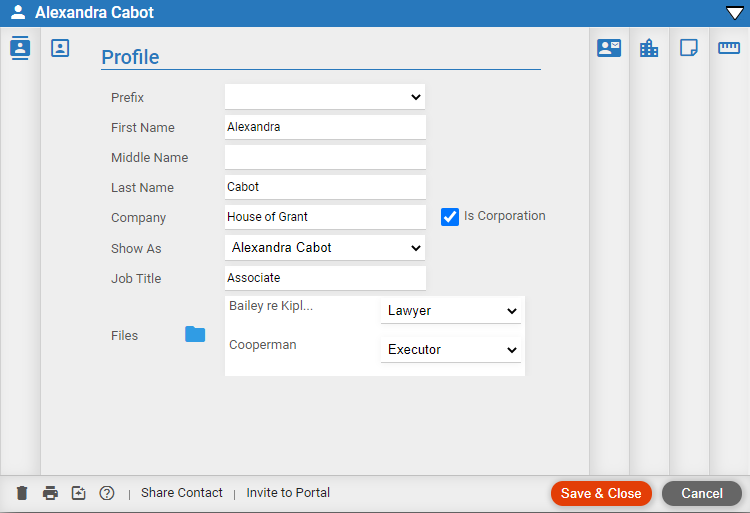
● Complete as many of the following fields in the Profile dialog as you like:
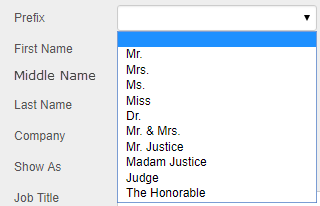
o Prefix –
Select
a prefix from the
dropdown list.
o First Name – Enter the contact's personal and/or company name.
o Middle Name – Enter the contact's middle name.
o Last Name – Enter the contact's last name.
o Company – Enter the name of the company.
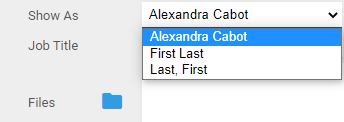
o Show As –
Select how you want the contact shown and and sorted in lists from the
dropdown menu—e.g., "Last, First". This is also how the contact
will display when you open their Business Card.
o Click the Duplicate Check link to perform a quick check to see if a contact of the same name already exists.
o If no
match is found the following prompt displays:
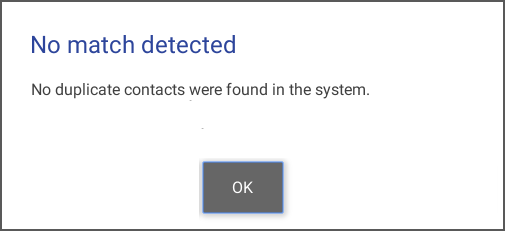
o Click OK to close the prompt and return to the new contact.
o When
an exact match is found based on the completed fields the following prompt
displays.
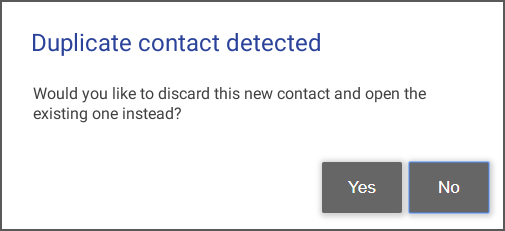
o Click Yes to cancel out of the new contact and open the first match in the list.
o Click
No to close the prompt and return to the new
contact so you can add more details. For example, you may need to add
JR after a name if the person is the second
in their family with the same name and they work for the same company.
● Click Save & Close to continue.
o Files and roles – Assign the contact to one or more files, and choose the role they play on each of those files (client, party, other, witness, etc.). Contacts on a file are accessible by all users assigned to that file.
o Client ID – If the contact is the primary client on any files, you can assign a unique client ID to the contact. It will appear in all those files.
o QuickBooks ID – If the contact is a QuickBooks customer you can assign a unique QuickBooks ID to the contact.
o Contact is a corporation – For billing purposes, you can
indicate that the contact is a corporation rather than an individual by
checking this box. This also affects how a contact with both personal
and company name is addressed in the Client Portal.
● Click the Contact pane and complete as many of the following fields in the Contact dialog as you like:
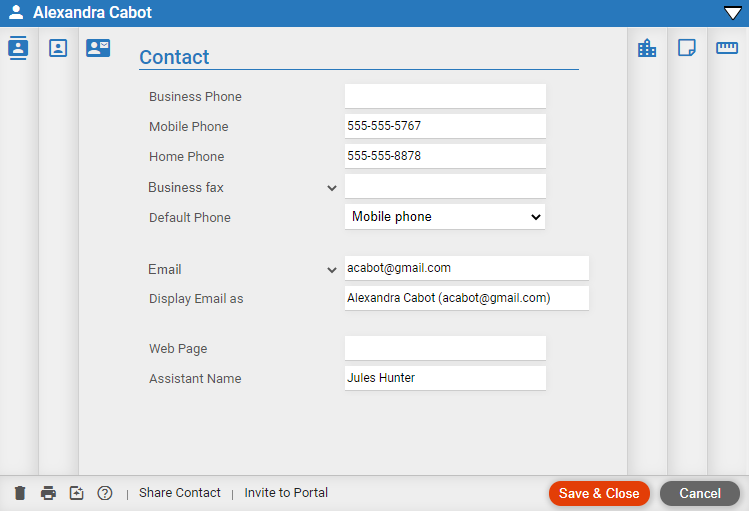
o Phone and fax numbers – Enter business, mobile, and home phone numbers. From the fourth field, you can enter one or more additional numbers: Business Fax, Assistant Phone, Business Phone 2, etc.
o The Default Phone field with a drop-down list is disabled when a contact does not have any phone numbers listed. You cannot enter a new number into this field.
o Email addresses –
Enter up to three email addresses and, in the field below, indicate how
you want each of them displayed—e.g. display "bbbrown@bbbinc.com"
as "Bobby Brown".
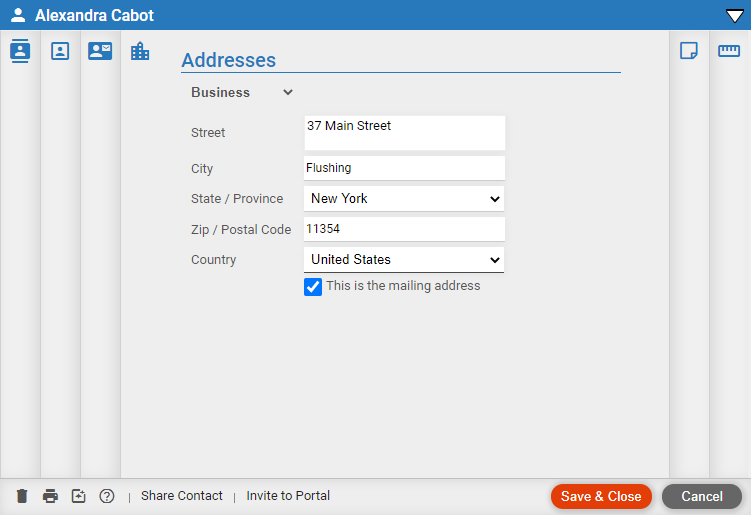
o Addresses: Enter up to three addresses: Business, Home, and Other, and choose which is the contact's mailing address.
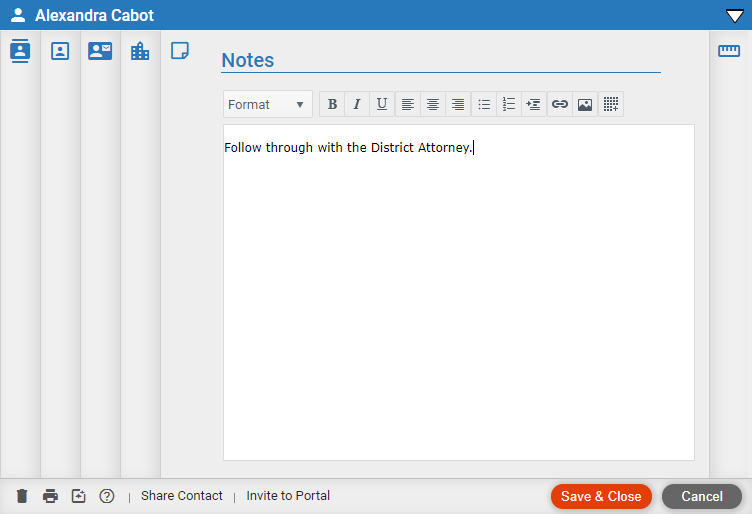
o Click
the Notes pane and add information for the contact.
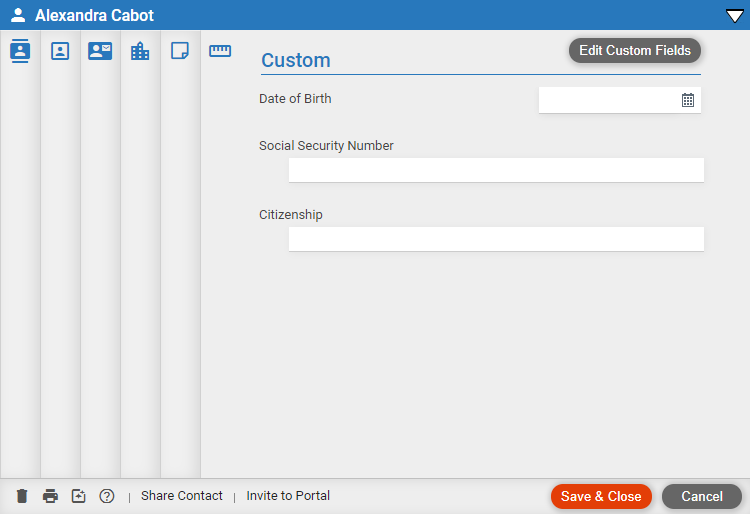
● Click
the Custom pane and click Edit
Custom Fields to use the Custom Field Editor
to design custom fields for all contacts and/or enter information for
this contact.
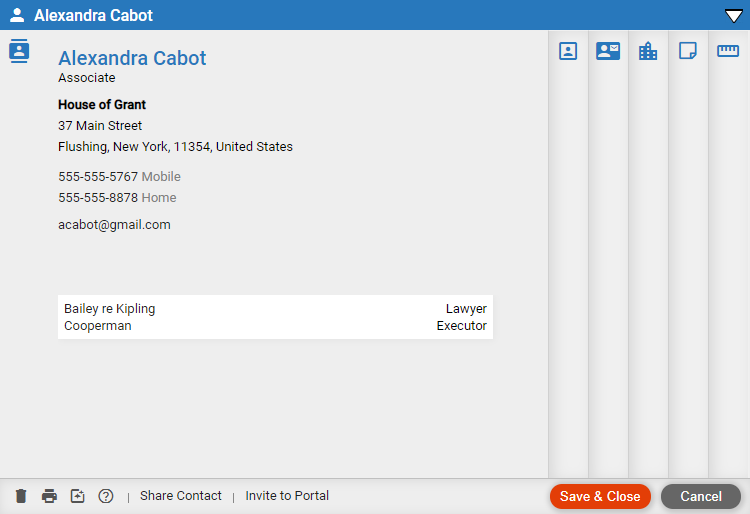
Review a summary of information on the first view of
the contact window.
 |
Note: If you edit these fields in any application outside of Amicus Cloud, it will be updated accordingly. |
● In general, contacts on files are automatically shared to the firm members on those files—each of those firm members will receive a copy of the contact in their My Contacts list.
● You can also
choose to share any particular contact, regardless of whether it's on
a file, to all firm members—click Share Contact.

If you then change your mind about sharing the contact (before saving it),
or if your new contacts are set to be shared by default and you don't
want to share this particular one, click No
at the prompt that displays or Cancel Sharing
while it is in progress.
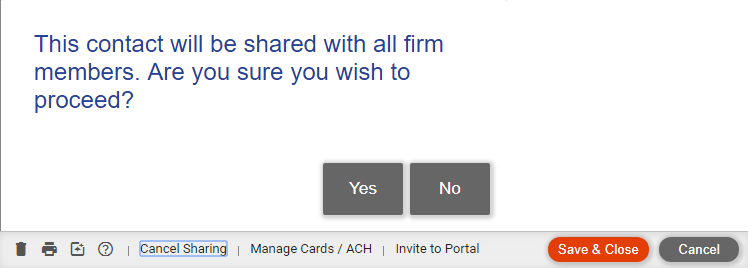
Once a contact has been shared and saved, it cannot be unshared. The button
will say Contact Shared.

● Design custom fields for contacts
Amicus Cloud (July 2023)
Copyright