[AFTER THE QUICKBOOKS LINK IS INITIALIZED AT YOUR COMPUTER]
● Periodically perform an exchange
● If the Amicus administrator changes their password
● If a new firm member or file type is added in Amicus
● If taxes are turned on for the first time in Amicus
● If a file or client is deleted in Amicus
● If a file is closed (or marked dormant or special) in Amicus
● If new active customers (on active jobs), or new active jobs are manually added in QuickBooks
● If the Link has stopped working properly and needs to be reset
Before running the QuickBooks Mapping Service or QuickBooks Exchange Service
from the QuickBooks Web Connector, ensure that QuickBooks is running at
the computer, with a QuickBooks billing supervisor logged in.
Send over new Amicus clients and files, payment transactions, and optionally trust transactions.
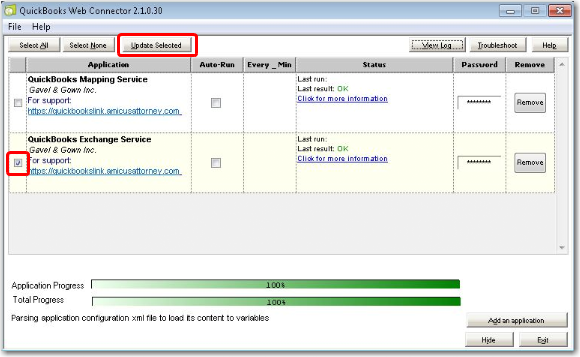
1. From the QuickBooks
Web Connector at the computer, run the QuickBooks
Exchange Service. (Select its checkbox and click Update
Selected.)

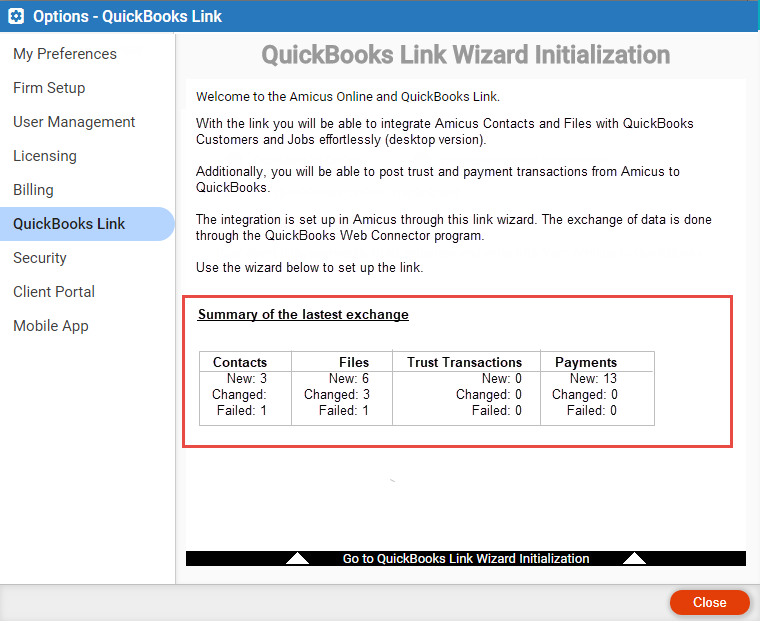
2. Consult the
"Summary of the Latest Exchange" section, shown on the first
page of the QuickBooks Link wizard.

3. Consult the
QuickBooks Posting Log, available
from the first page of the QuickBooks Link wizard.
.png)
4. For a report of billing transactions over both transaction and posting date ranges, optionally including transactions that haven't been posted to QuickBooks, consult the QuickBooks Transactions Report, available from the first page of the QuickBooks Link wizard.
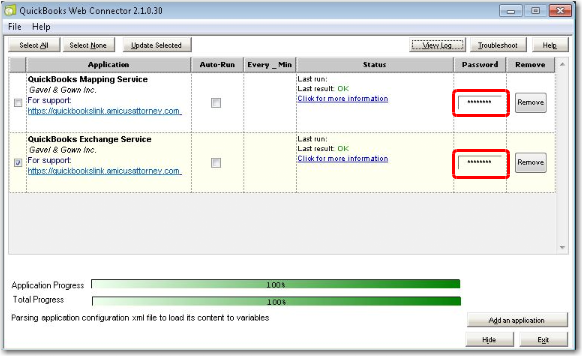
● In the QuickBooks
Web Connector, enter that new password for the QuickBooks Mapping Service
and QuickBooks Exchange Service.

Perform the following steps if the new firm member will be the responsible lawyer on any non-closed billable files, or if the new file type will be assigned to any non-closed billable files.
1. From the QuickBooks
Link Wizard, click Step 4 and
map all Amicus file types to QuickBooks job types, or map all Amicus firm
members to Quickbooks sales reps.
If corresponding sales reps or job types in QuickBooks aren't already listed
in the mapping screens, you must first manually add them in QuickBooks.
Then from the QuickBooks Web Connector, run the QuickBooks
Mapping Service.
2. From the QuickBooks Web Connector, run the QuickBooks Exchange Service.
If taxes are turned on for the first time in Amicus
Perform the following steps if Tax 1 or Tax 2 is turned on for the first time in Amicus (on any of the non-closed billable files).
1. From the
QuickBooks Link Wizard, click Step 4
and on the third screen, map all Amicus accounts to QuickBooks General
Ledger accounts.
If corresponding GL Tax Liability accounts in QuickBooks aren't already
listed in the mapping screen, you must first manually add them in QuickBooks.
Then from the QuickBooks Web Connector, run the QuickBooks
Mapping Service.
2. From the QuickBooks Web Connector, run the QuickBooks Exchange Service.
Deletions of Files or Clients in Amicus are not propagated to QuickBooks by the Link. The following steps are not required but they may help prevent any subsequent confusion.
1. Manually delete the corresponding job or customer in QuickBooks.
2. If you like, run the QuickBooks Mapping Service from the QuickBooks Web Connector to remove the job or customer from the QuickBooks Link Wizard's mapping screens.
File status is not exchanged by the Link. The file will be unlinked from the corresponding job in QuickBooks during the next exchange. The following steps are not required but they may help prevent any subsequent confusion.
1. Manually change the status of the corresponding job in QuickBooks to something other than active.
2. If you like, run the QuickBooks Mapping Service from the QuickBooks Web Connector to remove the job from the QuickBooks Link Wizard's mapping screens.
This should not generally occur—after the QuickBooks Link is initialized, users should add clients and files only in Amicus and then exchange them to QuickBooks via the Link.
1. Manually add the same customers and jobs in Amicus.
2. From the QuickBooks Web Connector, run the QuickBooks Mapping Service.
3. From the QuickBooks Link Wizard, click Step 5 and map the new QuickBooks customers/jobs to Amicus files/clients.
4. From the QuickBooks Web Connector, run the QuickBooks Exchange Service.
In the rare case that Amicus and QuickBooks databases have gotten out of sync and an Amicus Support technician has advised that the Link needs to be reset (reinitialized), perform the following steps.
1. In the QuickBooks Link Wizard, click Step 3, go to the third screen, and click Reset Link. This removes the links between Amicus files and QuickBooks jobs, and the links between Amicus primary clients and QuickBooks customers. Some options and mappings are also removed.
2. From the QuickBooks Web Connector, run the QuickBooks Mapping Service.
3. From the QuickBooks Link Wizard, redo the options and mappings that were removed:
o Click Step 3 and on the first screen, choose a posting start date for Amicus payment (and optionally trust) transactions to be exchanged to QuickBooks.
o Click Step 4 and map all Amicus file types to QuickBooks job types, map all Amicus firm members to Quickbooks sales reps, and map all Amicus accounts to QuickBooks General Ledger accounts.
o Click
Step 5 and map Amicus contacts to QuickBooks customers, and map Amicus
files to QuickBooks jobs.
4. From the QuickBooks Web Connector, run the QuickBooks Exchange Service.
● QuickBooks Link - What is it?
● QuickBooks Link - Initialize it
● QuickBooks Link - What does it exchange?
Amicus Cloud (July 2023)
Copyright