
For convenience, your new incoming and outgoing email can be automatically associated with a file. You may set this up from an email or from a file, whichever you prefer. This topic describes setup from a file.
An email address may be set for association with only one file, and any particular email may be associated with only one file. If you send an email to multiple addresses that are set for association with multiple files, the setting for only the first of those addresses in the email To list will be applied.
Your auto-association settings affect only your email. Other users may have different settings.
1. In the Email view of a file, click
Auto-Associate List at the bottom of the window.
2. The Auto-Associate
Email window lists the email addresses whose email are being automatically
associated with this file.
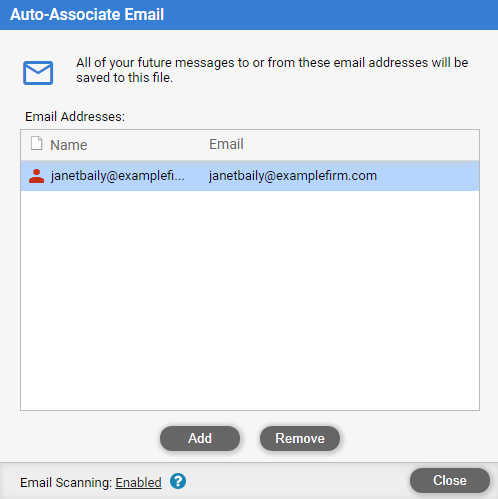
● To add an email address (for which you want email association to the file to occur automatically from now on), click Add.
● In the Select Contacts window, select the desired Contact and email address, and then click Save & Close.
o If you
attempt to add an address that was previously set for a different file,
a warning will appear. You may choose to have new email associated with
this file from now on. Any email already associated with the previous
file will remain associated with that file.
3. To remove an
email address (for which you want email associations to no longer occur
automatically), select the address and click Remove.
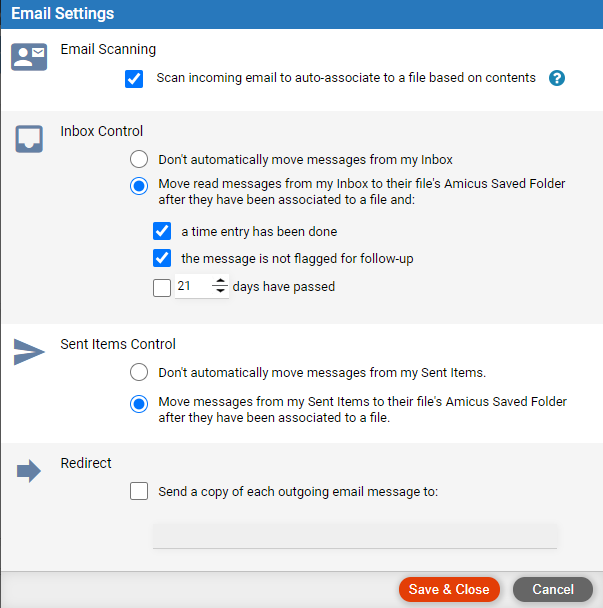
4. When Email Scanning: is Enabled, Amicus Cloud will scan each inbound email and attempt to match the sender's email address to a contact. If found, it will scan the email subject and body for matches to files related to that contact. If successful, the email will be automatically assigned to the file.
● Click the status
Enabled or Disabled
to open the Email Settings dialog and make changes.
● Associate new email with a file (set from an email)
Amicus Cloud (July 2023)
Copyright